| DATE |
PROGRESS |
GALLERY |
| 11th February 2012 |
Box arrived today! |
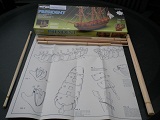 |
| 13th February 2012 |
Here we go! |
 |
| 2nd March 2012 |
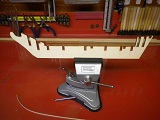
The decks were sanded and fitted, but were not glued at this stage. I've started planking. A bow filler was not mentioned in instructions. I think one
would have been an advantage. |
 |
| 22nd March 2012 |
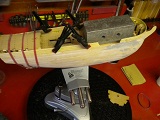
It took about 34 hours to complete the fitting of the first layer of planks. After sanding the
whole hull to remove the glue residue, I applied a layer of filler, to level off any indentations so that
I could get the correct profile of the bow. I then glued the decks in place. I had no major problems at this stage.
It's now ready for the second layer of planks. It all seems square and true, so I am hoping the preparation is correct. |
 |
| 15th April 2012 |
I soaked 12 planks at a time in warm water. I used an amati plank bender to attempt to bend the planks.
Here I hit my first problem. The planks would bend when wet, but when they dried and I placed them against the hull,
they split in various places. With my next 12 planks, I used steam to bend them, but the same thing happened. I did some research
and found that it is not uncommon that in the lower price bracket of the kit,
that the timber can be a little sub standard. As this model is not painted and for the world to see, I ordered new planks from my model shop. |
 |
| 23rd May 2012 |
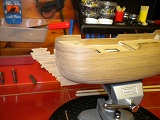
The new planks arrived at the cost of £11. What a difference! The planks bent well with no problems with
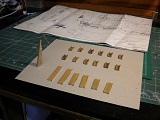
the fitting. As it's my first attempt I'm pleased with the finish. The next step is to plank the bulwarks and decks. For the decks
I need to cut 130 planks into 50mm strips, so I made a jig to assist with the cutting.
As the kit came with the decks already marked, there was no need to measure the correct position off the plan. |
 |
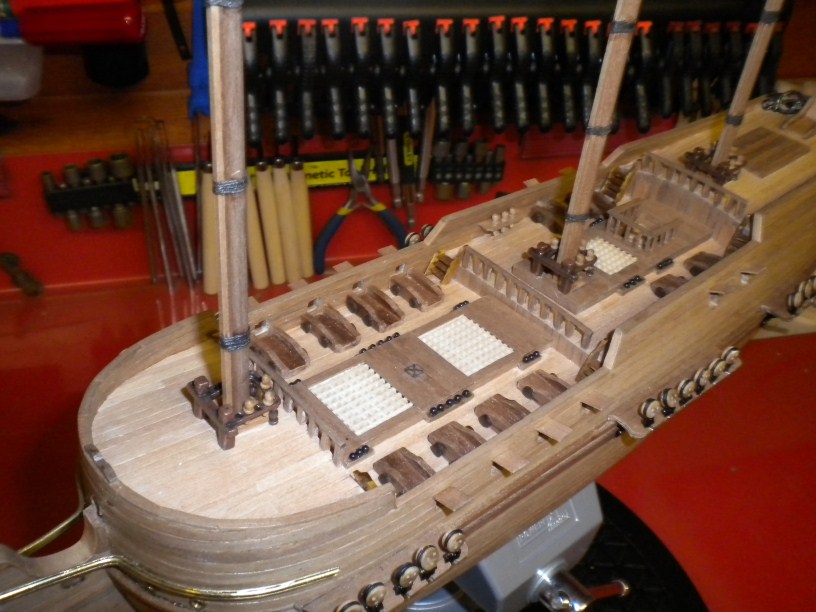
| June / July 2012 |
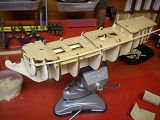
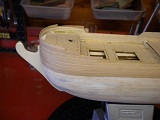
The decks and bulwarks were planked. The only slight tricky bit was the stern deck which is slightly
curved. But all went well after tapering the bottom edge of planks. The hand rails went well , as did the gun ports. Now came the
deck hatches. I found that the gratings supplied with the kit was short of 4 lenghts. so I had to order more. On arrival
they were made up, trimmed to fit snugly onto the decks. Nothing was glued at this stage. The ladders were made up and glued
into position. The rudder was planked and fixed in position. The hinges were a little tricky lining up. The nails kept on wanting to go the other way. The anchor stocks
were made and fitted. The masts were temporarliy fitted. |
 |
| Aug / Sept 2012 |
The chain plate boards were cut to size and planked.
I didn't look at the plan properly and I think I have put them slightly too far forward. Looking at the positions of the mast
holes, I might get away with it. The decorations were cleaned and painted and glued in place. The windows were fitted but not
glued at this stage. The deadeyes were fitted to the chain plate brackets and nailed to the hull. I made the stern flagpole
base and glued it in place. ( I removed the flagpole as I kept knocking it off) The bayling racks and lanterns
do not come with the kit. I purchased these from Cornwall Model Boats |
 |
| Oct / Nov / Dec 2012 |
All cannons glued to carriages. The mast supports fitted and lashed to the mast, as per the plan.
The companionway rail, capstan, wheel and bayling racks all glued in place. The catheads drilled out to take the anchor securing rope,
as were the portholes. The mast tops were planked and cut out to take the shroud lines. Fitted but not glued at this stage.
The figurehead fitted and painted as dictated by its current owner (me). The mast ropes were fitted. I now started the rigging. The ratlines took about
10 hours to fix to the chain plate deadeyes. Looking at the plan again, I think I know why I put the chainplate boards where I did. If
I had put them off plan the cannons when fired would have blown the rigging away. |
 |
| Jan - Oct 2013 |
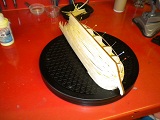
Now came the fixing of the yards. All was straight
forward with no problems. The final rigging of the ship went well, although a bit slow,
but worth the effort when finished. It is now moored above the stairs in
a perspex case. I enjoyed the build of this kit, but for my next venture a larger ship will be ordered.
(Santisima Trinidad is looking favourite!) |
 |
